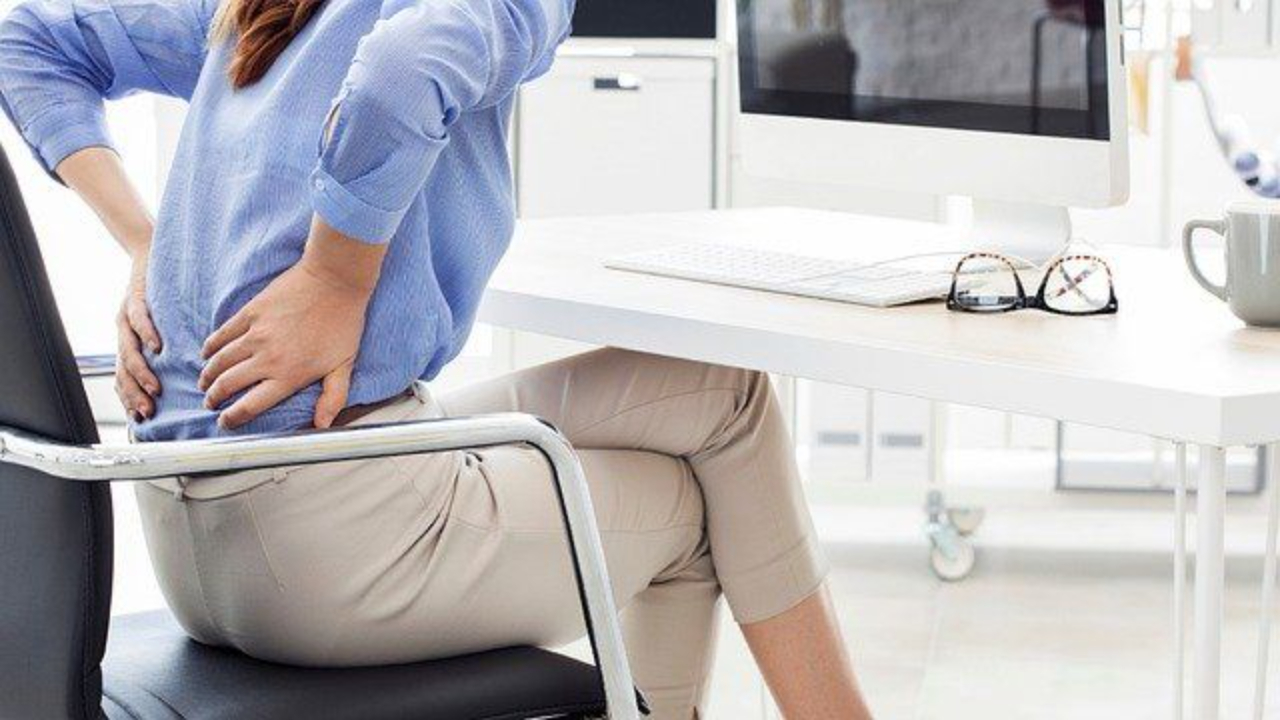
Banish Lower Back and Hip Pain for Good with these Posture Tips
Most back pain involves one or more of these meridians: Bladder (leg Tai Yang), the “extra” Belt (Dai) Vessel, and the Gall Bladder (leg Shao Yang).
Not that there is anything wrong with those organs! It’s just the name of the location according to TCM.
Acupuncture works by bringing more circulation to those areas.
At home, between acupuncture visits, you can treat your pain by doing movements that stimulate, stretch, and strengthen those meridians.
One of the reasons so many people end up with back, hip, knee, ankle and foot issues is that, as a society, we walk weird.
At some point in the last 100 years or so, we went from being able to walk miles a day without problems, to driving to the mailbox. Or my favorite, driving around an extra 30 minutes trying to find the perfect parking spot, as opposed to parking in the back and walking (realistically, half a block?) to the store.
Good walking posture involves using the back leg as a walking stick. The back leg, or the back leg’s GLUTES (butt muscles to be more specific), help push you forward.
What most people do when they walk, however, is lift the front leg and place it down. Over time, this weakens your knees, tightens your feet (bracing for impact, basically), and overuses your hip flexors.
To re-learn how to walk, there’s an exercise I recommend.
Stand upright with both feet together. Slightly bend your knees. Pull your lower ribs in toward your back (this is your “core”). Bring one foot forward, essentially half of a step, and stop. Your feet are now apart, standing with one in front of the other, but as if you’re on “train tracks,” meaning your feet are on 2 lines, not on the same line. Your weight should be even between both feet.
Keeping both feet on the ground, shift your body weight in the front foot. Can you balance here? Is your knee still bent? Hold onto the wall if you need to. Once you feel balanced, lift the back leg off the ground, straight up behind you.
Feel that muscle? That’s your gluteous medius. Otherwise known as your glutes. They’re your walking muscles. When you engage that area, make sure you’re not forgetting about the bend in the front leg and your core.
Set that foot back down. Rebalance your weight equally between both feet.
Again, keeping both feet down, shift your weight to your front foot. Use the glutes (now that you’ve found them) to help you balance. Keep both feet on the ground and shift onto the toes of the back foot.
CHECK: when you shift weight onto the front foot, do you lose your core?
Take 1 step forward. Stop. Do the same thing on the other side. Activate the glute and core, take one step, using that back leg to propel you forward. Make sure you’re landing with a bent knee in front.
You may also find it easier to shift your weight forward by using your foot muscles to push you. It’s almost as if you’re peeling your back foot off the ground starting with the heel and moving toward the toes. This gives a nice stretch through the foot, toes, and calf.
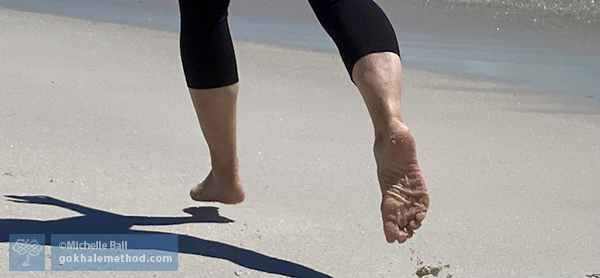
Photo credit: Gokhale Method
Practice this slowly for a few minutes each day and your glutes will become stronger. Stronger glutes = happier back! Also, stronger glutes help you with all activities, including sitting without pain, which we’ll talk about next.
Ideally, when we sit down, that should be a time to rest, recover, and not have pain.
Sitting should be restorative and not hurt. If you’re sitting properly, you’re using muscles designed to work in this situation, and letting the other muscles take a break.
Pointers for sitting:
FEET:
They should touch the ground comfortably. If not, use a stool. Your feet are about 10 – 15 degrees angled out to the sides. You should be able to grip the ground between your heel and toes.
PELVIS:
Your behind should be behind you. This is called anteverting your pelvis. Many of us are in the bad habit of tucking our tailbone under when we sit. If you have stiff hips, this will take time to get.
Strong glutes helps you sit better and without pain.
There’s a disc in your lower back between L5 and S1 shaped like a wedge. When you sit on your tailbone, with your hips tucked up under you, this wedge becomes compressed and can bulge or herniate or press on your sciatic nerve.
Scooch your bottom as far back into your chair as you can. You may even grab the flesh of your cheeks and pull them out behind you. Try using a bolster or rolled up towel on the back of the chair to angle your glutes up and back easier (as in the photo above).
RIB ANCHORING:
To avoid lordosis (over-arching in your back) and slumping, we need to anchor your ribs. This is basic core engagement.
Place your hands on your lower front ribs and roll your upper body over them. Get the feel kind of like a crunch. Now, keep that sensation and bring your shoulders back up. From here, either lean forward with a straight back or lean against the back of your chair with a straight back.
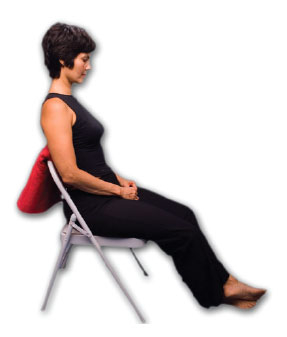
Photo credit: Esther Gokhale and Gokhale Method
* CHECK: use your hands to feel the muscles on either side of your lower spine. Do they feel tight? Focus more on anteverting your hips (tilting forward of the pelvis) and bringing your ribs in (core engagement).
SPINE:
From here, I’m going to stack up straight. The straight stacking is done with your ribs anchored.
Imagine your entire torso is like a tree trunk – your tailbone to the top of your head is one straight line. It’s your axis. You don’t want to lose your axis. This is your balance. This is how you can take deep breaths and sit without pain.
Many people who think they have good posture overarch their midback. This creates the “S-shaped” spine we’ve all heard about. The problem with the S-shaped spine is that it’s difficult to have your shoulders in a healthy “down and back” position when your upper back is already back.
Instead, I encourage you to bring those front, bottom ribs in (imagine – you’re waist-deep in cold water and your upper body is lengthening up and away). This allows a more graceful positioning for your shoulders and neck.
SHOULDERS:
One at a time, rotate your shoulder a little bit forward, then a little up, and then a lot down and back. This will open the chest and create room to breathe deeply. When you’re working, focus on keeping this feeling in your shoulders. Resist the temptation to curve your shoulders forward when you’re working. Lean forward with a straight back, keeping your shoulders down and back, chest open.
NECK:
Your neck should be straight and long like a straight extension from the rest of your spine. If you look at a properly aligned neck from the side, there is a slight downward angle from the middle of the ear to the tip of the nose. You may even use your fingers to push your chin in. Avoid “tech neck” where you jut your chin out. Angle your computer screen or work to where you look straight out or even slightly down.
BREATHING:
The most important part – you want to be able to do this and breathe at the same time.
When you’re breathing, use your mind’s eye to visualize what’s happening inside your body. When I’m breathing in, I’m visualizing Qi or energy moving from the base of my tailbone, up my spine, to the top of my head. When I exhale, the breath moves down the front of my body to the perineum. And repeat.
Your body is still, basically, but there is a lot of movement happening here. As you breathe, there are small movements in your torso. I’m using the engaged musculature to hold everything in place.
Sleeping Crooked?
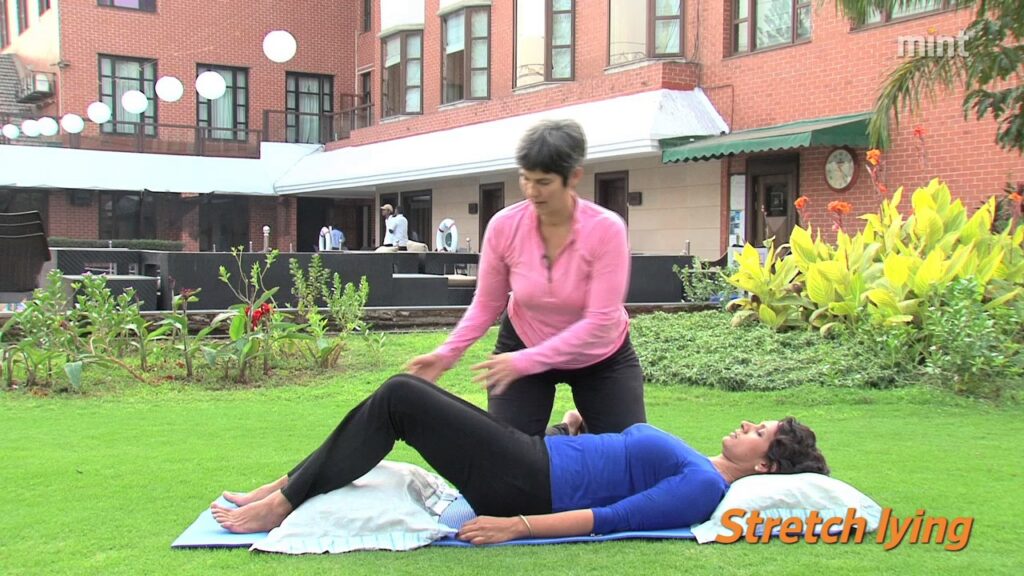
Photo credit: Gokhale Method
A lot of people think that their sleeping posture is the cause of their joint pains. To get in good alignment before going to sleep, when you get in bed, give a nice big stretch to straighten out your back first. Use pillows under your knees or hips to keep the alignment.
If you’re a side-sleeper, position your hips first by scootching your behind way behind you. Then, use pillows between your knees or in front of your hips to allow your back to lay straight from there.
Interested in learning more about how posture can help with chronic hip and lower back pain? Download my free guidebook, Don’t Ignore the Signs: Test Yourself for Back and Shoulder Problems today.